Ever had your computer act up after a bad update or mysterious crash? Don’t panic—System Restore might be your digital lifeline. This built-in Windows feature can rewind your PC to a healthier state, undoing system changes without touching your personal files. Let’s dive into how it works and how you can use it like a pro.
What Is System Restore and How Does It Work?

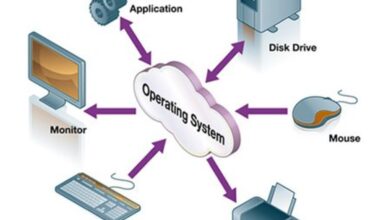
System Restore is a recovery tool built into Microsoft Windows that allows users to revert their computer’s system files, settings, and installed programs to a previous state. It’s designed to protect and repair the operating system in the event of instability or malfunction.


Understanding the Core Functionality
System Restore works by creating what are known as restore points—snapshots of your system’s critical files, registry settings, and installed programs at a specific moment in time. These restore points are automatically generated before major system events such as software installations, Windows updates, or driver changes.
- Restore points capture system state, not personal files.
- They are stored in a dedicated space on your hard drive.
- System Restore does not affect documents, photos, or emails.
How System Restore Differs from Backup Tools
It’s crucial to understand that System Restore is not a full backup solution. While tools like File History or third-party backup software save copies of your personal data, System Restore focuses solely on system integrity.
“System Restore is like a time machine for your OS, not your files.” — Microsoft Support
For example, if you accidentally delete a photo, System Restore won’t recover it. However, if a recent update caused your PC to crash, System Restore can roll back the system to a point before that update was applied.
When Should You Use System Restore?
Knowing when to trigger a system restore can save you hours of troubleshooting. It’s not meant for everyday use, but rather as a recovery tool when things go wrong.
After a Failed Windows Update
One of the most common reasons to use System Restore is after a problematic Windows update. Sometimes, updates can introduce bugs, compatibility issues, or even prevent your system from booting.
For instance, if your PC fails to start after installing a cumulative update, booting into Safe Mode and launching System Restore can revert the system to a stable state before the update was applied.
According to Microsoft’s official documentation, System Restore is specifically recommended for resolving issues caused by recent system changes.
Following Malware or Virus Infections
While antivirus software should be your first line of defense, some malware can deeply embed itself into system files. In such cases, running a system restore to a point before the infection can help eliminate persistent threats.
- Use System Restore only after running a full antivirus scan.
- Be cautious: some advanced malware can corrupt restore points.
- Consider disabling System Restore temporarily during cleanup, then re-enable it afterward.
After Installing Problematic Software or Drivers
Have you ever installed a new graphics driver only to find your screen flickering or your PC freezing? System Restore can undo such changes quickly.
When you install a new program or driver, Windows often creates a restore point automatically. If the new software causes instability, you can roll back to that point and return your system to normal operation.
How to Enable and Configure System Restore in Windows
By default, System Restore is enabled on most Windows installations, but it’s not always active on all drives. You may need to manually turn it on, especially if you’ve reinstalled Windows or are using a custom setup.
Enabling System Restore via Control Panel
To enable System Restore, follow these steps:
- Open the Control Panel and navigate to System and Security > System.
- Click on System Protection in the left-hand menu.
- Select your system drive (usually C:) and click Configure.
- Choose Turn on system protection.
- Adjust the maximum disk space usage (recommended: 5–10%).
- Click Apply and then OK.
This process activates System Restore and begins creating restore points automatically.
Customizing Restore Point Settings
You can fine-tune how System Restore behaves by adjusting its settings:
- Disk Space Usage: Allocate more space for more restore points, but don’t overuse SSD space unnecessarily.
- Restore Point Frequency: Windows creates restore points automatically, but you can manually create one before risky operations.
- Protection for Other Drives: You can enable System Restore on secondary drives, though it’s typically only necessary for the OS drive.
Scheduling Manual Restore Points
While Windows creates restore points automatically, it’s wise to create one manually before making significant changes. To do this:
- Go to System Protection in the System settings.
- Click Create.
- Enter a descriptive name (e.g., “Before Installing Adobe Creative Cloud”).
- Click Create and wait for the process to complete.
This gives you a reliable fallback option if something goes wrong.
Step-by-Step Guide to Performing a System Restore
When your system is acting up, performing a system restore can be a straightforward fix—if you know the steps.
Accessing System Restore from Windows Settings
The easiest way to start a system restore is through the Settings app:
- Press Windows + I to open Settings.
- Go to System > Recovery.
- Under Advanced startup, click Restart now.
- After reboot, choose Troubleshoot > Advanced options > System Restore.
- Follow the wizard to select a restore point.
Using System Restore from Safe Mode
If Windows won’t start normally, boot into Safe Mode:
- Restart your PC and press F8 (or Shift + F8 on newer systems) during boot.
- Select Safe Mode with Command Prompt or use recovery media.
- Once in Safe Mode, open the Start menu and type “System Restore”.
- Launch the tool and proceed with the restoration process.
This method is especially useful when drivers or startup programs are causing boot failures.
What Happens During the Restoration Process?
When you initiate a system restore, Windows does the following:
- Shuts down all running applications.
- Reverts system files, registry keys, and installed programs to the selected restore point.
- Preserves your personal files (documents, music, videos, etc.).
- Restarts the computer automatically upon completion.
“The restoration process can take 10 to 30 minutes, depending on system complexity and disk speed.” — TechNet
After reboot, you’ll see a confirmation that the restore was successful. Any programs installed after the restore point will be removed, and previous settings will be reapplied.
Troubleshooting Common System Restore Issues
While System Restore is generally reliable, it doesn’t always work as expected. Here are common problems and how to fix them.
System Restore Not Working or Stuck
Sometimes, the restore process fails or gets stuck at a certain percentage. This can happen due to:
- Corrupted system files.
- Insufficient disk space.
- Conflicts with third-party security software.
To resolve this, run the System File Checker (SFC) tool:
- Open Command Prompt as Administrator.
- Type
sfc /scannowand press Enter. - Wait for the scan to complete and repair any corrupted files.
- Try System Restore again.
“No Restore Points Found” Error
If System Restore says no restore points are available, it could mean:
- System Protection was disabled when the points were supposed to be created.
- Restore points were deleted due to disk cleanup or malware.
- The Volume Shadow Copy service is not running.
To fix this, ensure the Volume Shadow Copy service is active:
- Press Windows + R, type
services.msc, and press Enter. - Locate Volume Shadow Copy and Microsoft Software Shadow Copy Provider.
- Set both to Automatic and start them if they’re stopped.
- Reboot and try creating a new restore point.
System Restore Fails to Boot
If your PC won’t boot into the restore environment, use a Windows installation USB or recovery drive:
- Insert the recovery media and boot from it.
- Select your language and click Next.
- Click Repair your computer at the bottom left.
- Navigate to Troubleshoot > Advanced options > System Restore.
- Proceed as usual.
This method bypasses the need for Windows to boot normally.
Best Practices for Maximizing System Restore Effectiveness
To get the most out of System Restore, follow these expert-recommended practices.
Create Restore Points Before Major Changes
Always create a manual restore point before:
- Installing new software, especially from untrusted sources.
- Updating drivers or firmware.
- Performing Windows version upgrades.
- Changing system settings like registry edits.
This ensures you have a clean fallback option if something goes wrong.
Monitor Disk Space Allocated to System Restore
System Restore uses a portion of your hard drive to store restore points. If space is too low, older points get deleted. If too high, it can impact performance—especially on SSDs.
Recommendation: Allocate 8–10% of your system drive for System Restore. For a 500GB drive, that’s 40–50GB, which allows for dozens of restore points.
Combine System Restore with Regular Backups
System Restore is not a substitute for data backup. Use it alongside tools like:
- Windows File History
- OneDrive or other cloud storage
- Third-party backup software (e.g., Acronis, Macrium Reflect)
This dual-layer approach protects both your system and your files.
Alternatives to System Restore When It’s Not Enough
Sometimes, System Restore isn’t sufficient—especially if the issue is severe or restore points are missing.
Using Windows Reset This PC
If System Restore fails, Reset This PC is the next step. It reinstalls Windows while giving you the option to keep your files.
- Keep my files: Removes apps and settings, keeps personal data.
- Remove everything: Full wipe, like a fresh install.
Access it via Settings > System > Recovery.
System Image Recovery
A system image is a complete snapshot of your entire drive, including OS, programs, and files. Unlike System Restore, it can recover everything.
To create one, go to Control Panel > Backup and Restore > Create a system image. Store it on an external drive or network location.
According to How-To Geek, system images are the closest thing to a full system backup in Windows.
Third-Party Recovery Tools
Tools like Macrium Reflect, Acronis True Image, and EaseUS Todo Backup offer advanced recovery options, including:
- Scheduled system images
- Incremental backups
- Bootable rescue media
These are ideal for users who need more control and reliability than built-in tools provide.
Security and Privacy Considerations with System Restore
While System Restore is helpful, it has security implications that users should be aware of.
Can Malware Survive a System Restore?
In some cases, yes. Advanced malware can infect restore points or hide in areas not affected by System Restore. Some rootkits can even disable the feature entirely.
To minimize risk:
- Run a full antivirus scan before and after restoration.
- Consider deleting old restore points if malware was present.
- Use the
vssadmin delete shadowscommand to remove all restore points (use with caution).
Privacy: What Data Is Stored in Restore Points?
Restore points contain copies of system files, registry hives, and program data. While they don’t include your personal documents, they may contain:
- Browser history (from system-level files)
- Temporary internet files
- Application settings that might include login tokens
If you’re concerned about privacy, especially on shared or public computers, consider disabling System Restore when not needed.
Disabling System Restore for Performance or Security
Some users disable System Restore to free up disk space or improve SSD longevity. However, this removes a critical safety net.
If you must disable it:
- Go to System Protection.
- Select your drive and click Configure.
- Choose Disable system protection.
- Click Apply.
Remember to re-enable it after high-risk operations.
What is System Restore used for?
System Restore is used to revert your computer’s system files, settings, and installed programs to a previous state without affecting personal files. It’s ideal for fixing issues caused by software conflicts, failed updates, or driver problems.
Does System Restore delete personal files?
No, System Restore does not delete personal files such as documents, photos, music, or emails. It only affects system files, registry settings, and installed programs.
How do I create a restore point manually?
To create a manual restore point, go to Control Panel > System and Security > System > System Protection. Click “Create,” enter a name for the restore point, and click “Create.”
Can System Restore remove viruses?
System Restore may remove some malware if it was installed after the restore point was created. However, it’s not a reliable antivirus tool. Always run a full scan with trusted antivirus software.
Why is System Restore not working?
Common reasons include disabled System Protection, corrupted system files, insufficient disk space, or malware interference. Try running SFC /scannow, checking the Volume Shadow Copy service, or using recovery media.
System Restore is a powerful, built-in tool that can save you from system instability caused by updates, software, or driver issues. While it doesn’t replace full backups, it’s an essential part of any Windows user’s recovery strategy. By understanding when and how to use it—and combining it with good backup practices—you can maintain a stable, secure, and reliable PC. Whether you’re a casual user or a tech enthusiast, mastering System Restore gives you peace of mind knowing you can undo system mistakes with confidence.
Recommended for you 👇
Further Reading: